My very first experience with distributed version control system (DVCS) was with Bazaar (bzr) in late 2006. I only used it for a couple of weeks but it got me interested in DVCS and in 2007, I tried both Git and Mercurial.
In early 2009, I needed a solution to move my team off the Version Control System we used at the time (CVS!). The goal was to implement a more powerful workflow based on multiple branches. Distributed version control systems were still not yet mainstream, so the team would need to learn the concepts from scratch and then get acquainted with a new tool. I thought it would be simpler to go with Mercurial (in my opinion, git back then was more complex). A year later or so it started to be adopted at a larger scale within the company.
But I kept using Git from time to time and at some point I finally switched to it for my personal pet-projects. It became easy to use (or I got used to it). I won’t enter the debate about which one between Mercurial and Git is better than the other. They are based on the same concepts but slightly differ in the implementation, and then it is probably a matter of taste.
If there are still some people who are not familiar with Git (or with DVCS), I hope they’ll find this post useful. And if you already know about Git, maybe it can still be interesting. Initially it started as a list of commands to remember, a kind of cheat sheet, but eventually I decided to turn it into something bigger: a hitchhiker guide to git.
Table of Contents
- About DVCS
- Git (really quick) History
- Git Basics
- Navigating the History
- Branches
- Collaboration with Others
- Rewriting History
- Collaboration Model
About DVCS
DVCS stands for Distributed (or sometimes Decentralized) Version Control System. Version control systems are used to register all the versions (or intermediary steps) of a software source code. It is possible to examine how the source code has evolved over time, get back to a specific version, and share your changes with other developers. It is a critical tool in software development.
And it is not new. Version control systems have been out there for a while and they have evolved over time, so here is a bit of history. One of the first systems - if not the first - was Source Code Control System (SCCS) invented in 1972 at Bell Labs. A decade later, Revision Control System (RCS) was released as an alternative and started to get some traction. These early systems managed only one source-code file. So if your software was made out of several files (which is usually the case), each file was managed independently from each other and each got a different version. On top of this, both SCCS and RCS were using locks for editing. This means that only one developer at a time was able to edit a file. And finally, they had no concept of working copy: developers were working on the same files (hence the locking).
In 1986, Concurrent Versions System (CVS) was released and it brought some important improvements. CVS was an evolution over RCS that made it possible to manage files en masse. Initially CVS was still using RCS at file level and eventually it managed the files by itself. However, CVS retains from its ancestor the versioning per file. Even if you manage a group of files, each file gets its own version and CVS tracks all the files versions individually. Another improvement brought by CVS was the introduction of new ways to collaborate. In CVS, each developer gets their own working copy. This means that locking is no longer necessary and they can work concurrently on the same files of the project, hence the name of CVS. This enabled CVS to eventually offer a client/server architecture and, to my knowledge, made it the first Centralised Version Control System. The history of all the changes of your software (ie all the files versions) is kept on a server. You can get local copies of the files so you can modify them however you don’t have the history of each file. To retrieve the history, you need to query the server. The operation of getting local copies of files is called a checkout. After you have modified your local copies of the files, you can register on the server a new version for all the files you modified. This operation is called a commit. To get the changes from other people you will update your local copies of the files to get the new versions. The server is the central point, it is the repository of all your files versions. There are several centralised systems: CVS, Subversion, Clearcase and Perforce among others.
Decentralised version control systems such as Mercurial or Git do not have a central server that keeps track of everything. There is no unique central repository. Instead there are numerous repositories and each keeps track of the files history. It does not mean that the files history is broken into several pieces with each piece stored in a different repository. That’s why I prefer the term Decentralized over Distributed for DVCS. In fact each repository contains the full history of what happened. In other words, the history is stored over and over in the different repositories. When working with decentralised version control system, instead of getting local copies of the files, you get a local copy of the entire repository, together with the entire history. For collaboration, a peer-to-peer approach is used instead of the traditional client-server used by the previous generation of version control systems. To my knowledge, one of the first DVCS - if not the first - was BitKeeper released in 2000. In 2001-2003 several other systems were released: Arch, Darcs and Monotone. Finally in the first half of 2005, three new systems were released: Bazaar, Git and Mercurial. Today Git is the most used one. (Note: The rest of this section will mostly use git naming convention.)
In DVCS, you need to extract a working copy of the files from the local repository if you want to perform changes. This is usually done automatically for you when you obtain a copy - or a clone - of the repository and the working copy in that case points to the latest version of the files. However, you can get a working copy of the files from any version registered in the repository. Versioning in distributed version control system is global, meaning that files are not versioned individually; all the files are versioned together. So the changes between two versions are registered as one big change even if several files were modified. Such a modification to the repository is called a changeset. Each changeset gets a unique identifier in the repository in the form of a cryptographic hash (historically SHA-1, with Git transitioning to SHA-256 for improved security). These identifiers are the various versions of your repository.
A working copy of the files for a given version is obtained via the checkout operation and one can create a new changeset via the commit operation. Contrary to the equivalent commands in centralised version control systems, in DVCS the checkout and commit operations are 100% local since they operate on the local repository only. Meaning you can query the history, you can checkout a given version or you can commit changes even if you are offline. And no one sees (yet) what you do in your repository.
For people to see the changes you have done, you need to explicitly share your changes with them. What you can share are the changesets from your local repository that they don’t have in their local repository. This is done through commands that are specific to DVCS: push and pull. With a push, you send all your local changesets to a remote repository provided you have write permission on this repository. On the contrary, with a pull you get from a remote repository the changesets you don’t have into your local repository. A pull only necessitates read permission on the remote repository.
Git (really quick) History
A bit of history: Git was created by Linus Torvalds, the creator of the Linux kernel, to keep track of the changes and versions of the kernel. Before that, tarballs and patches were used until 2002 and then BitKeeper a proprietary DVCS solution. Since it was aiming from the beginning at managing the Linux kernel source code, it was built for performance and relative scale. The first version was released in 2005, at about the same time as Mercurial, after BitKeeper changed its licensing model.
Git Basics
Init
Let’s start using git. To work with Git, we first need a local repository. We can create a brand new (empty) repository. This is done via:
$ git init
This will create a .git/ folder that will contain (in fact that IS) your repository. Everything will be stored in that hidden folder. The root folder that contains the .git/ folder is the root of the work tree (also called working copy). The work tree is where you can actually get some work done. You can normally add some files or folders in it as in any regular folder. However, because it contains a .git/ folder (ie the repository), you will also be able to run some git commands on the files it contains and therefore to interact with the repository itself.
Alternatively, it is possible to create a special type of repository which is called a bare repository. A bare repository behaves like a normal repository but the difference is that no work tree can be attached to it. Because no work tree can be attached to it, there is no need to put the content of the repository in a .git/ folder. So the content of the .git/ folder is created directly where you ran the init command. To create a bare repository:
# git init --bare
You might wonder what the use of a bare repository could be since you need a work tree to perform changes on files. In fact a bare repository is generally used on a server. This is the place where changesets are exchanged and no development is actually done on this repository. We will see later how to exchange changesets between repositories.
Once you have a local repository with a work tree, you can start doing some modifications.
Ignoring Files with .gitignore
Before you start adding files, it’s important to know that some files should never be tracked by Git. These include:
- Build artifacts and compiled code
- Dependencies (like
node_modules/) - Environment files with secrets (
.env,credentials.json) - IDE-specific files (
.vscode/,.idea/) - Operating system files (
.DS_Store,Thumbs.db) - Log files
To tell Git to ignore these files, create a .gitignore file in your repository root:
$ touch .gitignore
Then add patterns for files and directories to ignore. Here’s a typical example:
# Dependencies
node_modules/
vendor/

# Build outputs
dist/
build/
*.class
*.o

# Environment files
.env
.env.local
*.key

# IDE files
.vscode/
.idea/
*.swp

# OS files
.DS_Store
Thumbs.db

# Logs
*.log
logs/
Important notes:
.gitignoreonly affects untracked files. If you already committed a file, you need to remove it from tracking first:$ git rm --cached <file> $ git commit -m "Remove tracked file that should be ignored"- You can have multiple
.gitignorefiles in subdirectories - Use
#for comments - Patterns support wildcards:
*(any characters),?(single character),**(any number of directories) - Negate patterns with
!:!important.log(don’t ignore this one)
You can find language-specific .gitignore templates at github.com/github/gitignore.
Status, Add/Stage
As you add, edit or rename files Git knows what you have done in your work tree compared to the most recent changeset in the repository. In fact, if you have lost track of your changes you can ask Git. It will remind you of everything you have done. This is done via:
$ git status
Git status gives you a comprehensive output of all the changes you have done from its perspective. The files can be:
* untracked: git knows nothing about the file; this is the case for new files
* deleted: git knows about the file but it does not exist anymore in the work tree
* modified: git knows about the file; it was modified in the work tree
For example:
On branch main
Changes not staged for commit:
  (use "git add/rm <file>..." to update what will be committed)
  (use "git checkout -- <file>..." to discard changes in working directory)

	modified:   file.txt
	deleted:    fileToRemove.txt

Untracked files:
  (use "git add <file>..." to include in what will be committed)

	newFile.txt

no changes added to commit (use "git add" and/or "git commit -a")
Looking at the status output, you can see that git informs you that some of the changes are not staged for commit. Indeed, should you do a git commit, that is to say should you want to register your changes in your local repository as a new changeset, nothing will happen. This is because git expects you to tell specifically what changes you want to be taken into account for the next commit. The operations of selecting which changes should be added for the next commit is called staging and is performed via the git add (or git stage) operation.
$ git add [file|folder]
Git maintains an index (also known as staging area) of changes to be taken into account for the next commit and git add simply adds changes to that index. However, sometimes git add is not necessarily what you want to do. Let’s take the example of an existing file that you decided to rename. Git will detect this as two changes: the original file is deleted, a new file is created. When doing a git add, git tries to be smart and to detect whether the content of a deleted file is similar to the content of a created file and in that case it will record the change as a rename instead of a deletion and a creation. However if both the file has been renamed and its content changed, doing a git add will not result in the correct behavior as git will not know in that case that the content of new file is not exactly new and the history of that file will be incorrect. To prevent this, git provides a way to record the renaming of a file into the index:
$ git mv <old_file_name> <new_file_name>
Additionally, to delete a file and add the deletion of the file to the index right away, git also provides:
$ git rm <file>
The alternative for a deletion is to do:
$ rm <file>
$ // Git detects the file as deleted but the deletion is not added to the index
  // i.e. it is not staged. When ready, you can add the deletion to the index.
$ git add <file>
This latter method can be surprising since you use git add to record the deletion of a file. A synonym for add is stage and for some people it feels more logical to use stage rather than add. So you can also do:
$ git stage <file>
To add the change for that file to the index (also known as the staging area).
Now if you do a git status, you will see that git informs you that there are changes staged and ready to be committed:
On branch main
Changes to be committed:
  (use "git reset HEAD <file>..." to unstage)

	modified:   file.txt
	deleted:    fileToRemove.txt
	new file:   newFile.txt
Staged changes can be unstaged if needed. See the Undoing Changes section below for details on unstaging files and discarding changes.
Interactive Staging
Sometimes you want fine-grained control over what gets staged. Instead of staging entire files, you can stage specific changes within files using interactive staging.
Patch mode (git add -p) lets you review and stage changes hunk by hunk:
$ git add -p <file>
Git will show you each change and ask what to do:
Stage this hunk [y,n,q,a,d,s,e,?]?
Common options:
y- yes, stage this hunkn- no, don’t stage this hunks- split into smaller hunkse- manually edit the hunkq- quit; don’t stage this or remaining hunks?- show help
Interactive mode (git add -i) provides a menu-driven interface:
$ git add -i
This opens an interactive prompt where you can:
- Stage/unstage files
- Review changes
- Update files to stage
- Revert changes
Why use interactive staging?
- Create atomic commits (one logical change per commit)
- Separate debugging code from actual changes
- Review changes before committing
- Commit parts of a file while leaving other changes unstaged
Example workflow:
$ git add -p app.js        # Stage only bug fix
$ git commit -m "Fix bug"
$ git add app.js           # Stage remaining changes
$ git commit -m "Add feature"
Undoing Changes
Sometimes you need to discard changes in your working directory or unstage files. Git provides several commands for this, with modern alternatives introduced in Git 2.23+.
Discarding changes in the working directory:
The traditional way to discard uncommitted changes:
$ git checkout -- <file>
Modern Git (2.23+) introduced a clearer alternative:
$ git restore <file>
Both commands discard modifications to a file and restore it to the last committed state. Warning: This operation is destructive - your changes are lost permanently.
Example:
# You modified file.txt but want to discard changes
$ git status
Changes not staged for commit:
    modified:   file.txt

# Discard changes (old way)
$ git checkout -- file.txt

# Or discard changes (new way, recommended)
$ git restore file.txt

# file.txt is now back to its last committed state
Unstaging files:
If you staged a file but want to unstage it (keep the changes, just remove from staging area):
Traditional way:
$ git reset HEAD <file>
# or simply
$ git reset <file>
Note: When you run git status after staging files, Git suggests using git reset HEAD <file> to unstage. The HEAD parameter refers to the current commit, but it can be omitted as it’s the default. We will discuss HEAD in more detail later.
Modern Git (2.23+) alternative:
$ git restore --staged <file>
Example:
# You staged file.txt but want to unstage it
$ git status
Changes to be committed:
    modified:   file.txt

# Unstage (old way)
$ git reset file.txt

# Or unstage (new way, recommended)
$ git restore --staged file.txt

# file.txt is unstaged but changes remain in working directory
Combining operations:
You can discard changes and unstage in one workflow:
# Unstage and discard changes (old way)
$ git reset file.txt
$ git checkout -- file.txt

# Unstage and discard changes (new way)
$ git restore --staged file.txt
$ git restore file.txt

# Or in one command (new way only)
$ git restore --staged --worktree file.txt
Discarding all local changes:
To discard all uncommitted changes in the working directory:
$ git checkout -- .
# or
$ git restore .
Warning: This discards all changes in tracked files. Use with caution.
Removing untracked files:
The above commands only affect tracked files. To remove untracked files (files that git status shows as “Untracked files”):
$ git clean -n     # Dry run - show what would be deleted
$ git clean -f     # Force - actually delete untracked files
$ git clean -fd    # Delete untracked files and directories
$ git clean -fdx   # Delete untracked files, directories, and ignored files
Example workflow:
# See what would be deleted
$ git clean -n
Would remove newfile.txt
Would remove temp/

# Actually remove them
$ git clean -fd
Removing newfile.txt
Removing temp/
Important differences between commands:
| Command | Effect on Working Directory | Effect on Staging Area |
|---|---|---|
git checkout -- <file> |
Discards changes | No change |
git restore <file> |
Discards changes | No change |
git reset <file> |
No change | Unstages file |
git restore --staged <file> |
No change | Unstages file |
git clean -f |
Removes untracked files | No effect |
Best practices:
- Use
git restoreinstead ofgit checkout --for better clarity (Git 2.23+) - Use
git restore --stagedinstead ofgit resetfor unstaging (Git 2.23+) - Always use
git clean -nfirst to preview what will be deleted - Consider using
git stashinstead of discarding if you might need changes later - Remember: discarding changes is permanent - you can’t get them back
Commit
Once you added some changes to the staging area, you can commit your staged changes:
$ git commit
This will open your editor so that you can add a commit message. Commit messages are very important. Remember that for now, whatever you committed is local to your repository. At some point, you will want to exchange your changes with others. The commit message attached to your changeset will allow them to know what your changes are about. So pay attention to your commit messages - they are recorded forever in the history of the repository. Good commit messages usually contain a title and then a description about the changeset.
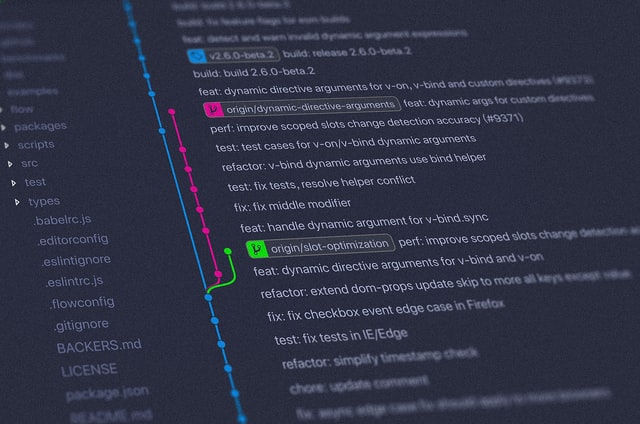
When a commit is done, the changeset is recorded in the history and it is given a unique hash identifier that corresponds to the hash of the modifications done. A changeset also references the hash identifier of the previous changesets: its parent. So changesets are linked and in practice they form a Direct Acyclic Graph. Right now, if you keep editing files and committing, the graph will be a very simple one: a linked list of changesets. But it can get really complicated and we will see how later on. It is important for now to understand and remember that the history is organized as a graph.
Stash - Temporarily Saving Work
Often you need to switch branches or pull updates, but you’re not ready to commit your current work. git stash temporarily saves your uncommitted changes and gives you a clean working directory.
Basic stash operations:
$ git stash                    # Save current changes
$ git stash save "message"     # Save with descriptive message
$ git stash list               # See all stashes
$ git stash pop                # Apply latest stash and remove it
$ git stash apply              # Apply latest stash but keep it
$ git stash drop               # Delete latest stash
$ git stash clear              # Delete all stashes
How stash works:
BEFORE STASH:
    Working Directory          Staging Area          Repository
    ┌───────────────┐         ┌──────────────┐      ┌──────────┐
    │ modified:     │         │ staged:      │      │ A ─── B  │
    │  - file1.txt  │   -->   │  - file2.txt │  --> │   HEAD   │
    │  - file3.txt  │         └──────────────┘      └──────────┘
    └───────────────┘

AFTER 'git stash':
    Working Directory          Staging Area          Repository        Stash
    ┌───────────────┐         ┌──────────────┐      ┌──────────┐     ┌─────────────┐
    │    (clean)    │         │   (empty)    │      │ A ─── B  │     │ stash@{0}:  │
    │               │         │              │      │   HEAD   │     │  - file1.txt│
    │               │         └──────────────┘      └──────────┘     │  - file2.txt│
    └───────────────┘                                                │  - file3.txt│
                                                                     └─────────────┘

AFTER 'git stash pop':
    Working Directory          Staging Area          Repository        Stash
    ┌───────────────┐         ┌──────────────┐      ┌──────────┐     ┌─────────┐
    │ modified:     │         │ staged:      │      │ A ─── B  │     │ (empty) │
    │  - file1.txt  │   <--   │  - file2.txt │      │   HEAD   │     └─────────┘
    │  - file3.txt  │         └──────────────┘      └──────────┘
    └───────────────┘         (restored)
Stash with message (recommended):
$ git stash save "WIP: refactoring user authentication"
Viewing stashes:
$ git stash list
stash@{0}: On main: WIP: refactoring user authentication
stash@{1}: On feature: debugging API error
Applying specific stash:
$ git stash apply stash@{1}      # Apply specific stash
$ git stash drop stash@{1}       # Drop specific stash
Advanced options:
$ git stash -u                   # Include untracked files
$ git stash --keep-index         # Stash unstaged changes only
$ git stash branch <name>        # Create branch from stash
Common workflow:
$ git stash                      # Save work in progress
$ git switch main                # Switch to different branch
$ git pull                       # Update main
$ git switch -                   # Return to previous branch
$ git stash pop                  # Continue where you left off
Why use stash?
- Quick context switching without losing work
- Pull updates without committing incomplete work
- Experiment with code then easily revert
- Clean working directory for operations that require it
Navigating the history
At this point, you can access the log of your repository (a.k.a. the history) and see your changesets there. This is done via the git log operation.
$ git log
Git log will show you all the changes with the most recent ones at the top and down in the history. What is shown is the hash identifier of the changeset along with the author name with its email address, the commit date and finally the commit message:
commit 17052868361adce69c7657cbf1afccce869a2e0f (HEAD -> main)
Author: Author Name <name@domain.com>
Date:   Wed Jul 4 21:33:07 2018 +0200

    Add a new file

    This is the description why this new file was added. It can be on
    several lines. It is a good practice to wrap the commit message at
    72 characters and to keep the title under 50 chars.
It is possible to actually see the changes in the form of a patch (diff -u) via:
$ git log -p
Also, if you want to list only the N most recent changesets, simply do (N=3 here):
$ git log -3
git log can give you a lot of important information about what happened in a repository and it comes with plenty of other options. In particular it is possible to inspect the differences between two changesets in the graph with the following command:
$ git log <ID-1>..<ID-2>
This will list all the changesets in the history accessible from <ID-2> that are NOT accessible from <ID-1>. It might seem a bit surprising explained like that so let’s take an example:
  A ─── B ── C ── D ── E
        ^              ^
      ID-1            ID-2

From ID-2, we can reach: E, D, C, B, A
From ID-1, we can reach: B, A

'git log <ID-1>..<ID-2>' will output E, D ,C
So this command seems to output all the commit between <ID-1> and <ID-2>. And this is the case if the history is linear. But let’s consider a non linear history. (Don’t worry how we can get to a non linear history for now, we’ll see this later).
                     ID-1
                      V
          X ─── Y ─── Z
         /
  A ─── B ── C ── D ── E
                       ^
                      ID-2

From ID-2, we can reach: E, D, C, B, A
From ID-1, we can reach: Z, Y, X, B, A

'git log <ID-1>..<ID-2>' will output: E, D ,C
In the latter case, this is a bit counter-intuitive as one might have expected to see all the commits between <ID-1> and <ID-2>. There is a three-dots version of the log command that will do exactly this:
$ git log <ID-1>...<ID-2>
The 3 dot version lists all the changesets in the history accessible from <ID-1> OR <ID-2> but not both. So on the above example:
                     ID-1
                      V
          X ─── Y ─── Z
         /
  A ─── B ── C ── D ── E
                       ^
                      ID-2

From ID-2, we can reach: E, D, C, B, A
From ID-1, we can reach: Z, Y, X, B, A

'git log <ID-1>...<ID-2>' will output E, D ,C, Z, Y, X
You don’t necessarily need to specify a full commit hash. You can provide what is called a revision specifier. A revision specifier allows to identify changeset in more human-friendly ways. The most common revision specifier is the short hash. Git can figure out what commit you refer to if you simply provide the beginning of the complete hash. You can provide as many characters (or as little - but at least 4) you wish: as long as git finds a unique complete hash starting with the characters you provided, it’ll be fine. Otherwise you’ll get an error.
Another way to specify a commit is to use HEAD. HEAD refers to the last commit. From HEAD it is possible to refer the commit before HEAD: HEAD^ or HEAD~1. Or more generally, it is possible to specify N commits before HEAD: HEAD~N. There are some other way to refer to a commit that we will see later.
It is possible to know all the information about a given commit thanks to the command git show:
$ git show <commit-hash | revision specifier>
git show will display all the information about the commit including the diff applied on top of the previous commits. Diffs (or patches) are obviously central to git. Though this is a simplistic definition, what git does is managing patches, identifying them with a cryptographic hash and linking them together in the order they are to be applied.
Git provides the means to see the diffs:
$ git diff <rev_1> <rev_2>
git diff will output the patch to apply to go from <rev_1> to <rev_2>. And if <rev_1> is in fact a more recent revision than <rev_2>, then git diff outputs the reverse patch compared to the ones applied when going from <rev_2> to <rev_1>.
The diff command also allows to display the diff between a particular revision and the work tree - what you have done and not yet staged or committed.
$ git diff <rev>
git diff supports the two-dots and three-dots notation like git log. The two-dots notation is simply a synonym of the standard git diff.
$ git diff <rev_1>..<rev_2>
is equivalent to:
$ git diff <rev_1> <rev_2>
The three-dots notation is subtle:
$ git diff <rev_1>...<rev_2>
compares <rev_2> with the most recent common ancestor in the graph between <rev_1> and <rev_2>. The most recent common ancestor of two changesets, also known as the lowest common ancestor in graph theory, is the most recent changeset in the history that has both these two changesets as descendants.
Let’s see what this means if we assume we have the following history:
                     rev_1
                      V
          X ─── Y ─── Z
         /
  A ─── B ── C ── D ── E
                       ^
                     rev_2
The most recent common ancestor between <rev_1> and <rev_2> is B. So git diff <rev_1>...<rev_2> will calculate the diff between B and E.
                     rev_1
                      V
          X ─── Y ─── Z
         /
  A ─── B ── C ── D ── E < rev_2
        ^              ^
        |              |
        +--------------+
      diff between B and E
    => git diff <rev_1>...<rev_2>
The most recent common ancestor between two revisions <rev_1> and <rev_2> can be obtained with the following command (the name of this command will become clearer later):
$ git merge-base <rev_1> <rev_2>
So in practice, git diff <rev_1>...<rev_2> is equivalent to:
$ git diff $(git merge-base <rev_1> <rev_2>) <rev_2>
This command is a lot more verbose but actually explains exactly what the three-dots notation does with git diff.
IMPORTANT: You might have noticed that the two-dots and three-dots notations have a bit of a mismatched meaning between git log and git diff. There is an email thread about this where the git developer recommends to unlearn two-dots and three dots when using git dif. He explains that allowing two-dots with git diff was a mistake and what it does had some consequences on what the three-dots notation does with git diff as well. The only reason why I am including them in this guide is because it is very tempting to use them with git diff once we learn using them with git log. And because they work without an error and actually do something, it’s good to understand what they do in details.
Finding Bugs with git bisect
When you discover a bug but don’t know which commit introduced it, git bisect performs a binary search through your commit history to find the culprit. This is much faster than manually checking commits one by one.
How it works:
- You tell git which commit is “bad” (has the bug)
- You tell git which commit is “good” (doesn’t have the bug)
- Git checks out a commit in the middle
- You test and tell git if this commit is good or bad
- Git repeats until it finds the first bad commit
Binary search visualization:
Initial state (16 commits to test):
A ─── B ─── C ─── D ─── E ─── F ─── G ─── H ─── I ─── J ─── K ─── L ─── M ─── N ─── O ─── P
✓                                                                                           ✗
good                                                                                       bad
                                        ↓
                                Test commit H (middle)

Step 1: H is good
A ─── B ─── C ─── D ─── E ─── F ─── G ─── H ─── I ─── J ─── K ─── L ─── M ─── N ─── O ─── P
✓     ✓     ✓     ✓     ✓     ✓     ✓     ✓                                               ✗
                                                  ↓
                                            Test commit L (middle of H..P)

Step 2: L is bad
A ─── B ─── C ─── D ─── E ─── F ─── G ─── H ─── I ─── J ─── K ─── L ─── M ─── N ─── O ─── P
✓     ✓     ✓     ✓     ✓     ✓     ✓     ✓                   ✗     ✗     ✗     ✗     ✗     ✗
                                                  ↓
                                            Test commit J (middle of H..L)

Step 3: J is good
A ─── B ─── C ─── D ─── E ─── F ─── G ─── H ─── I ─── J ─── K ─── L ─── M ─── N ─── O ─── P
✓     ✓     ✓     ✓     ✓     ✓     ✓     ✓     ✓     ✓           ✗     ✗     ✗     ✗     ✗     ✗
                                                              ↓
                                                        Test commit K

Step 4: K is the first bad commit! (bug introduced here)
Basic bisect workflow:
$ git bisect start
$ git bisect bad                    # Current commit has the bug
$ git bisect good v1.0              # v1.0 was working fine

# Git checks out a middle commit
# Test your code...

$ git bisect good                   # Or 'git bisect bad'

# Git checks out another commit
# Keep testing and marking good/bad...

# Git will eventually find the first bad commit
$ git bisect reset                  # Return to original HEAD
Automated bisect:
If you have an automated test, you can let git bisect run automatically:
$ git bisect start HEAD v1.0
$ git bisect run npm test
Git will run the command on each commit and mark it good (exit code 0) or bad (non-zero exit code).
Example scenario:
# Bug appeared between v2.0 and now
$ git bisect start
$ git bisect bad                    # Current state is broken
$ git bisect good v2.0              # v2.0 was fine

Bisecting: 6 revisions left to test after this (roughly 3 steps)
[commit-hash] Some commit message

# Test the application...
$ npm test    # Test fails
$ git bisect bad

Bisecting: 3 revisions left to test after this (roughly 2 steps)
[commit-hash] Another commit

# Test again...
$ npm test    # Test passes
$ git bisect good

# Continue until...
abc1234 is the first bad commit
commit abc1234
Author: Developer Name
Date: Mon Jan 15 14:30:00 2024

    Changed algorithm implementation

$ git bisect reset
Tips:
- Bisect works best with a clean, linear history
- Make sure each commit in your history is buildable
- You can skip untestable commits:
git bisect skip - Use
git bisect logto see the bisect history - Use
git bisect visualizeto see remaining commits graphically
Branches
Isolate developments
Branches are what makes git (and DVCS systems in general) great. They are different history paths in your repository. From a common trunk, they represent two different directions taken in the development on the same code base. Branches therefore allow to work on different versions of the software within the same repository and each version remains isolated from the others. It is not uncommon to create a new branch for each new feature you need to add to your software.
Git is extremely powerful at managing branches. So much in fact that in Git everything is a branch. The default branch is called master or main (the name is now actually configurable and historically it was master; for the rest of the article we will call it main). Right after the creation of a git repository (git init), you are on the main branch. To know what branch you are on, simply type:
$ git branch
The output of git branch will list all the existing branches and tell you which one is currently checked out (identified by *):
$ git branch
* main
  feature-A
The creation of a new branch is very simple:
$ git branch <branch_name>
Starting from the most recent changeset in your current branch, Git will create a new reference to that changeset that will allow to take a different direction in the development from this point.
The branch exists but the work tree is still a checkout of the branch you created your new branch from (main very likely). To switch to the newly created branch, you need to check it out in your work tree. The checkout operation will extract from the repository all the files for that version and put a copy of them in your filesystem so you can start modifying them. This is done via:
$ git checkout <branch_name>
Alternatively, recent versions of git introduced a switch command to switch from one branch to another because checkout was a bit confusing for this purpose. So the more modern way is:
$ git switch <branch_name>
Now that your working copy is on the new branch, every changes you do, all operations (including the commit) will be on that branch. The other branch(es) will have no trace of those changes.
Branches can be renamed at your convenience even if you already committed changesets. This is done via:
$ git branch -m <old branch name> <new branch name>
or simply:
$ git branch -m <new name>
to rename the current branch you are on.
It is of course also possible to delete a branch once we are done with it:
$ git branch -d <name of the branch>
Once you have switched to a branch, you can inspect the history of that branch via the usual history inspection commands:
$ git log
And while on a specific branch, you can inspect the history of the other branches by doing:
$ git log <branch_name>
It is possible to switch back and forth between branches as you would switch topics in your development flow:
$ git branch awesome-feature      // create a new branch
$ git switch awesome-feature      // switch to it
// do some code, do some commits
$ git switch main               // switch back to the main
$ git branch bug-fix              // create a new branch for a bug fix from main
$ git switch bug-fix              // switch to it
// do some code, do some commits
$ git switch awesome-feature      // switch back to your feature branch
// do some code, do some commits
Merge
At some point though, taking the above example, you want the feature or the bug fix you have been working on in a branch to be available in your ‘main’ software branch. You don’t want to choose between the new feature or the bug fix, eventually you will want both in your software.
For this, git provides the means to merge one branch onto another. This means that git will apply the changesets from one branch into another. For example, you may want to merge your bug-fix branch onto main. Provided the main is checked out, this is done via:
$ git merge bug-fix
It is possible that main contain some changesets that are unknown to the bug-fix branch: things you have commited in main after the creation of the bug-fix branch. So the two branches may have diverged:
                    X ─── Y ─── Z        bug-fix
                   /
      A ─── B ─── C ─── D                main
                  ↑
            merge base
Remember that the history is a graph and that it could get complicated? This is how.
The merge command will find the most recent common ancestor between the two branches (B in our example) and apply the changesets between B and Z into main (so X, Y and Z). When merging two branches that have diverged, git does a 3-way merge, the most recent common ancestor being the merge base. This is why git merge-base <rev_1> <rev_2> that we have seen before outputs the most recent common ancestor between two revisions.
In our example, because the two branches have diverged, git creates a new commit after the merge is finished to register it. The merge commit contains two parents and git prompts you for a commit message. The result in the following:
                    X ─── Y ─── Z        bug-fix
                   /             \
      A ─── B ─── C ─── D ─────── E      main
                               (merge commit)
However when merging it may be needed to resolve conflicts. This happens if the same portion of the code has been modified differently in the two branches. After the merge command, files with conflicts will contain in the work tree some markers about where the conflict occurred. No new changeset will have been created in this case. We are in fact still in the process of merging.
An example of a conflict can be:
    This is a file sample
    <<<<<<< HEAD
    The file has been modified in main.
    =======
    The file has been modified in bug-fix
    >>>>>>> bug-fix
    This is the end of the file.
You can then resolve the conflict. For instance, you can modify the file this way:
    This is a file sample
    The file has been modified in main and in bug-fix.
    This is the end of the file.
Once the file is modified, you can add the changes in staging (git add) and commit (git commit). This will create the changeset for the merge - that would be the changeset E in the above diagram for example. At this point, all conflicts are resolved and committed; the merge is finished.
When merging two branches that have not diverged, there is no need to create an additional commit and git does not prompt for a commit message.
BEFORE MERGE:
                    X ─── Y ─── Z        bug-fix
                   /
      A ─── B ────┘                      main
Applying bug-fix on main in the above configuration is trivial and in that case git is doing a “fast forward”: simply moving the main reference from B to Z.
AFTER MERGE (fast-forward):
      A ─── B ─── X ─── Y ─── Z          main, bug-fix
It is possible to instruct git to not do that when merging and to register a new commit for the merge in all cases.
$ git merge --no-ff bug-fix
This will give the following result:
                    X ─── Y ─── Z        bug-fix
                   /             \
      A ─── B ──────────────────── C     main
                                (merge commit)
Branches are very convenient and allow to work on several topics at the same time in your repository. Once you are happy with your development and you want to release a new version of your software or simply remember a particular changeset, you can tag that changeset:
$ git tag <tag name>
This will attach a tag to your changeset and you will be able to reference that changeset using this tag. If you do not provide a revision specifier, git will tag the changeset your are on. Otherwise, you can tag a particular commit:
$ git tag <tag name> <revision specifier>
With branches and merges, the history can get complicated but git provide a nice way to look at it with the useful:
$ git log --graph
This command will display a graphical (ascii-based) representation of the graph.
Cherry-picking Commits
Sometimes you want to apply a specific commit from one branch to another without merging the entire branch. This is where git cherry-pick comes in handy.
Basic cherry-pick:
$ git cherry-pick <commit-hash>
This creates a new commit on your current branch with the same changes as the specified commit (but with a different hash).
Visualization:
BEFORE cherry-pick:
                    X ─── Y ─── Z        feature-branch
                   /
      A ─── B ─── C ─── D                main
                        ↑
                       HEAD

      $ git cherry-pick Y    (pick commit Y from feature-branch)

AFTER cherry-pick:
                    X ─── Y ─── Z        feature-branch
                   /
      A ─── B ─── C ─── D ─── Y'         main
                              ↑
                             HEAD
                        (new commit with
                         same changes as Y,
                         but different hash)
Note: Y and Y’ have the same changes but different parent commits and different hashes.
Cherry-picking multiple commits:
$ git cherry-pick <commit1> <commit2> <commit3>
$ git cherry-pick <start-hash>..<end-hash>    # Range of commits
Common use cases:
-
Hotfix to multiple branches:
# Fix bug on main $ git switch main $ git commit -m "Fix critical bug" # Creates commit abc123 # Apply same fix to release branch $ git switch release-1.0 $ git cherry-pick abc123 -
Selectively merging features:
# Pick only specific features from a branch $ git switch main $ git cherry-pick feature-branch~3 # Pick 3rd commit from feature -
Recovering commits:
# Pick commit from abandoned branch
$ git cherry-pick abandoned-branch
Handling conflicts:
If conflicts occur during cherry-pick:
# Fix conflicts in files
$ git add <resolved-files>
$ git cherry-pick --continue

# Or abort
$ git cherry-pick --abort
Advanced options:
$ git cherry-pick -n <commit>          # Cherry-pick without committing
$ git cherry-pick -x <commit>          # Add reference to original commit
$ git cherry-pick --no-commit <c1> <c2>   # Multiple without committing
Important notes:
- Cherry-picking creates a new commit with a different hash
- The original commit remains in its original branch
- Don’t cherry-pick commits that have already been merged (causes duplicates)
- Cherry-picking rewrites history - use carefully in shared branches
When to use cherry-pick:
- Applying hotfixes to multiple release branches
- Selectively porting features
- Recovering specific commits
- Backporting bug fixes
When NOT to use cherry-pick:
- Merging entire feature branches (use
git mergeinstead) - On public/shared history (can cause confusion)
- When the commit depends on other commits not being cherry-picked
Working on Multiple Branches with git worktree
Normally, your repository has one working directory where you can work on one branch at a time. git worktree allows you to have multiple working directories attached to the same repository, each with a different branch checked out.
Why use worktree?
- Work on multiple branches simultaneously without switching
- No need to stash changes when switching contexts
- Run tests on one branch while developing on another
- Compare implementations across branches side-by-side
- Review pull requests without interrupting current work
Basic worktree operations:
$ git worktree add <path> <branch>       # Create new worktree
$ git worktree list                      # List all worktrees
$ git worktree remove <path>             # Remove worktree
$ git worktree prune                     # Clean up worktree metadata
How it works - visual representation:
BEFORE worktree:
┌─────────────────────────────────────────┐
│  ~/project/  (main worktree)            │
│  ┌─────────┐                            │
│  │  .git/  │  (repository)              │
│  └─────────┘                            │
│  ┌─────────────┐                        │
│  │ src/        │  feature-a branch      │
│  │ tests/      │  (working directory)   │
│  │ README.md   │                        │
│  └─────────────┘                        │
└─────────────────────────────────────────┘

AFTER 'git worktree add ../hotfix main':
┌─────────────────────────────────────────┐
│  ~/project/  (main worktree)            │
│  ┌─────────┐                            │
│  │  .git/  │◄─────┐ (shared repository) │
│  └─────────┘      │                     │
│  ┌─────────────┐  │                     │
│  │ src/        │  │ feature-a branch    │
│  │ tests/      │  │ (working directory) │
│  │ README.md   │  │                     │
│  └─────────────┘  │                     │
└───────────────────┼─────────────────────┘
                    │
┌───────────────────┼─────────────────────┐
│  ~/hotfix/  (additional worktree)       │
│                   │                     │
│  ┌─────────────┐  │                     │
│  │ src/        │  │  main branch        │
│  │ tests/      │  │  (working directory)│
│  │ README.md   │  │                     │
│  └─────────────┘  │                     │
└───────────────────┴─────────────────────┘

Both worktrees share the same .git repository
but have independent working directories!
Example workflow:
# You're working on feature-a in main worktree
$ git switch feature-a

# Urgent bug fix needed, create separate worktree
$ git worktree add ../hotfix main
$ cd ../hotfix
$ # Fix bug, commit, push
$ cd -                          # Back to feature-a

# Need to review feature-b while keeping feature-a
$ git worktree add ../feature-b-review feature-b
$ cd ../feature-b-review
$ # Review code, run tests
Directory structure example:
myproject/                  # Main worktree
├── .git/
└── src/

myproject-hotfix/          # Additional worktree
└── src/

myproject-feature-b/       # Another worktree
└── src/
Create worktree from new branch:
$ git worktree add -b new-feature ../new-feature
# Creates new branch 'new-feature' and checks it out in ../new-feature
Cleanup:
$ git worktree remove ../hotfix
# Or if you deleted the directory manually:
$ git worktree prune
Important notes:
- Each worktree shares the same
.gitrepository - You cannot checkout the same branch in multiple worktrees
- Commits in any worktree affect the shared repository
- The main worktree (original clone) cannot be removed with
git worktree remove
Common use cases:
-
Emergency fixes without stashing:
$ git worktree add ../emergency-fix main $ cd ../emergency-fix $ # Make fix, commit, push $ git push $ cd - $ git worktree remove ../emergency-fix -
Running long tests:
$ git worktree add ../test-run feature-branch $ cd ../test-run $ npm test # Long running tests # Continue working in main worktree while tests run -
Side-by-side comparison:
$ git worktree add ../old-implementation v1.0
$ git worktree add ../new-implementation v2.0
$ diff -r ../old-implementation ../new-implementation
Tips:
- Use relative paths (
../) for worktrees to keep them alongside main repo - Name worktrees clearly to know what they’re for
- Clean up worktrees when done to avoid confusion
- Check
git worktree listregularly to track active worktrees
Collaboration with others
Clone
At this point, you should know how to make modifications and commit them, how to inspect the history, how to use branches and how to merge them. However, everything we have seen so far remain local to your repository and keeping your changes local is of little use if your intent is to collaborate with others. For this Git provides you with the means you need to share your changes.
Collaboration with DVCS such as git or mercurial is not constrained by design. Contrary to centralised VCS where there is a central server that everyone must interact with, in DVCS the collaboration can be organised the way you want. While centralised VCS impose by design a star network where the server is the central hub, DVCS allows any kind of interactions. It is not uncommon to have several people collaborating together on a topic in isolaton while some others work on something else. And eventually they will converge.
To contribute to a project, the first thing that is needed is to get a copy of the code. With git (and with DVCS in general) you don’t get just a copy of the code: you get a complete clone of the repository you want to contribute to. Not just a working copy but the entire history; an exact clone of the maintainer repository.
This operation is called clone and can be done via the command:
$ git clone <repository>
A repository is usually identified by a URL. Example:
- https://git.kernel.org/cgit/linux/kernel/git/torvalds/linux.git
- git://github.com/torvalds/linux.git
The clone operation does two things: first it copies the repository and then it checks out the latest version of main (the most recent changeset) so you have right away a working copy of the files. It is also possible to clone a repository and not checking out anything. In that case you clone a repository into a bare repository.
$ git clone --bare <repository>
Cloning an repository into a bare repostory may seem odd. In fact it is very useful: this bare repository can be used as a local relay for collaboration. For instance you want to work on a specific feature with a group of people, you can set up a bare repository for these people where collaboration can happen until the feature is ready. Meanwhile the original repository - the one you cloned from - is never involved. And when everything is ready you can send your changed to the original repository and start a new cycle. By convention a bare repository name ends with “.git” extension, but that’s only a convention.
After the cloning operation, your local repository is an exact copy of the remote one. And very importantly they share the very same history. At this moment, the two most recent commits in the two repositories are the same and have the very same SHA-1 hash identifier. Different changes done in the remote repository and in the local one will result in the two repositories to diverge (exactly like for branches): they will have a different looking history (different changesets) starting from the last changeset they had in common. This last changeset they had in common is called the most recent common ancestor.
Remote & Fetch
After a clone, the two repositories (the original one and the cloned one) remain linked together by the fact they have a common history. When you cloned, git has automatically kept a local reference to the remote repository and it called it origin. You can see it thanks to the command:
$ git remote
origin
or, in my opinion, the more useful:
$ git remote -v
origin	https://git.kernel.org/cgit/linux/kernel/git/torvalds/linux.git (fetch)
origin	https://git.kernel.org/cgit/linux/kernel/git/torvalds/linux.git (push)
origin is a local reference. It is not synchronized automatically with the remote repository it represents. You need to instruct git to fetch the last changes that were added in origin. This is done with the git fetch operation:
$ git fetch origin
By default, if origin is omitted it is implied (well not exactly but at this stage this is close enough; more on this later), so you can simply do git fetch. To perform a git fetch, your simply need to have read-access to the remote repository. But you certainly have since you cloned it.
Managing remote repositories is important to be able to collaborate with others. This is needed to “link” your repository with others’ repositories and to be able to interact with them. It possible to add a new remote repository reference:
$ git remote add <local name of the remote> <URI to the remote>
Similarly, it is possible to remove a reference to a remote:
$ git remote remove <local name of the remote>
And to rename a remote:
$ git remote rename <old name> <new name>
The local reference origin which we mentioned above is nothing more than a remote repository that git created automatically at the time you cloned. A remote repository entry allow you to know what happened in that remote repository and allows you to contribute to that repository as well. To synchronize your local reference of the remote repository you can use git fetch as already explained:
$ git fetch <local name of the remote>
Remote tracking branches & Tracking branches
Naming convention: For clarity and brevity, let’s first agree on some naming convention for the rest of the article.
- branch: the local name of the branch
- remote: the local name of the remote repository
- remote branch: the name of the branch in the remote repository
Now, with this out of the way, let’s have a look at remote tracking branches.
Each branch in the remote repository is also present in your local reference after you git fetch. It is called a remote tracking branch.
A remote tracking branch is therefore a local reference to a branch existing in a remote repository. It is read-only. A remote tracking branch is always represented by the name of the remote and the name of the branch in the remote: <local name of remote>/<name of branch in remote>. A remote tracking branch is updated only when communicating with the remote repository via git fetch <local name of remote> for example. When you cloned a repository you therefore get at least one remote tracking branch that is called origin/main.
To see the existing branches in a remote repository, you can use:
$ git remote show <remote>
or
$ git branch -r
The last command will list all the remote tracking branches for all remote repositories in the form:
<remote>/<remote branch>
Because a remote tracking branch is read-only, if you want to make local modifications you will need a tracking branch.
A tracking branch (also called upstream branch) is a local branch corresponding to a remote tracking branch. Modifications can be done in that branch. A tracking branch can be named whatever. Tracking branches are used to do contributions that are meant to be shared with the remote branch in the remote repository. When you cloned a repository, git created a tracking branch for the remote tracking branch origin/main and called it main. This is where you can do your modifications.
Let’s see the relationships between the remote tracking branch and the tracking branch.
When you do a git fetch, the remote tracking branch is updated but the tracking branch is not. To update the tracking branch, a git merge is needed. In other word, you need to merge the remote tracking branch onto the tracking branch. On the tracking branch:
$ git merge <remote>/<remote branch>
Alternatively, you can git fetch the modifications into the remote tracking branch and git merge it onto the tracking branch in one command. On the tracking branch:
$ git pull <remote> <remote branch>
It is important to understand that remote tracking branches can be updated only from what exists in the corresponding remote repository. If new branches appear in the remote repository, corresponding remote tracking branches are automatically created the next time you fetch. On the contrary, tracking branches can be updated with local modifications that you do. So if you want to contribute some code to the branch of a remote repository, you first need to create a tracking branch out of the corresponding remote tracking branch. To create a tracking branch from a remote tracking branch, we have several options:
$ git branch --track <branch> <remote>/<remote branch> // to create it
$ git switch <branch> // to switch to it
or
// create it and switch to it in one command
$ git checkout -b <branch> <remote>/<remote branch>
or
$ git checkout --track <remote>/<remote branch>
// This last option does not allow to specify the name of the local branch
or (in recent versions of git)
// create it and switch to it in one command
$ git switch -c <branch> <remote>/<remote branch>
Alternatively, if you have a local branch that you want to turn into a tracking branch (or upstream branch), when that branch is currently active you can do:
$ git branch -u <remote>/<remote branch>
Branch <branch> set up to track remote branch <remote branch> from <remote>.
The -u option can be replaced by the longer and more explicit –set-upstream-to.
To see all your tracking branch, you can use git branch -vv:
$ git branch -vv
  feature   22f0aa8 [origin/feature: ahead 18] <commit message>
  main      22f0aa8 [origin/main: ahead 15] <commit message>
* my-branch 22f0aa8 <commit message>
In the above example, feature is a tracking branch for origin/feature and main is a tracking branch for origin/main. On the contrary, my-branch is not a tracking branch.
Git knows which remote tracking branch is linked to a tracking branch. Therefore when you do git fetch without specifying the remote repository, git will use the remote associated with the remote tracking branch for the tracking branch you are on. That’s why above we said that when doing a git fetch origin, if origin is omitted then it is implied but that was not entirely correct. That was the case because the example assumed that we were on the main branch which is a tracking branch for the remote tracking branch origin/main.
Push
Once you have a tracking branch, you can modify it and commit. The modifications you did are still local to your repository. At some point, you will certainly want to share these modifications with the remote repository. A way to do this is to reach-out to the owner of the remote repository and ask her/him to pull (ie: fetch and merge) from your repository. If you have write access to the remote repository, you can also push your changes. This is done via git push which pushes the changesets from the specified local branch to the same name branch of the specified remote repository:
$ git push <remote> <branch>
// branch == remote branch
Indeed git push expects by default the name of the local branch to be the same than the one in the remote repository. If there is no branch with the same name in the remote repository, then git will create it. When you push a new branch to a remote repository, git creates a remote tracking branch in your repository for the newly created branch in the remote repository. However when you do this, your local branch is not turned into a tracking branch for this remote tracking branch. Usually, this is not what you want. To push a local branch to a remote repository and turn your local branch into a tracking branch, you can do:
$ git push --set-upstream <remote> <branch>
// branch == remote branch
or the shorter:
$ git push -u <remote> <branch>
In this case, after the push, your local branch is turned into a tracking branch of the remote tracking branch <local name for the remote>/<branch name in the repo>.
If you push from a tracking branch, git already knows what remote you want to push to and what is the branch name. So on a tracking branch, you can simply do a git push and it will do what you expect. This will work provided you did not rename your local branch. Indeed if you renamed your local branch, even if it is a tracking branch, git will output an error message:
    fatal: The upstream branch of your current branch does not match
    the name of your current branch.  To push to the upstream branch
    on the remote, use

    git push origin HEAD:<remote branch>

    To push to the branch of the same name on the remote, use

    git push <remote> <branch>
To push to a remote branch with a different name than your local branch, you need to give a mapping between the local branch and the remote branch:
$ git push <remote> <branch>:<remote branch>
This will tell git to push the changesets from the local branch <local branch name> into the branch <branch name in the remote> from the repository locally identified by <local name of the remote>.
Using this syntax, you can even delete a remote branch:
$ git push <remote> :<remote branch>
This basically instructs git to push no branch to the remote branch in the remote repository and this will effectively delete the remote branch. This syntax is not really intuitive so to delete a branch on the remote repository you may like better:
$ git push <remote> --delete <remote branch>
If you push to a non-bare repository, it is not possible to push on a branch that is the current active branch in the remote repository. Indeed the owner has a working copy checked-out on that branch and pushing to it would create new changesets that she/he is not aware of. It would make the work tree inconsistent. Git will output the following error message in that case:
remote: error: refusing to update checked out branch: refs/heads/main
remote: error: By default, updating the current branch in a non-bare repository
remote: error: is denied, because it will make the index and work tree inconsistent
remote: error: with what you pushed, and will require 'git reset --hard' to match
remote: error: the work tree to HEAD.
Collaboration: fetch, merge, push
Collaboration using fetch, pull, merge and push can then be summarized in the following diagram:
                             Repository A
                    A ─── B ─── C    (branch: main)
                     \
                      X ─── Y      (branch: feature-A)
    \___________________________________________________________/
             |                                        ^
             |                                        |
             |                                        |
             |   git fetch                            |  git push (from cloned repo)
             |                                        |   or git pull (from repo A)
             v                                        |
                      Do some code on feature-A
  A ─── B ─── C         ───────────────────>    A ─── B ─── C
  \           ^                                  \           ^
   \    origin/main                               \    origin/main
    X ─── Y                                        X ─── Y ─── R ─── S ─── T
          ^                                              ^                 ^
  origin/feature-A, feature-A                     origin/feature-A      feature A
\_____________________________________________________________________________/

            Cloned Repository B, origin = Repository A
To keep your repository in sync with the remote repository, you will regularly pull from it (ie fetch + merge) in your tracking branch. If your repository and the remote one have diverged, you will need to merge and record the merge.
For instance, suppose that at the time you cloned the repository was:
A ─── B main
Then you did some work:
A ─── B ─── X ─── Y ─── Z main
After some time, you fetch from origin and you get:
           X ─── Y ─── Z          main
         /
  A ─── B ─── C ─── D             origin/main
While you were working on the X, Y and Z changesets, the remote repository got C and D. You can then merge origin/main onto your main branch to benefit from C and D:
               X ─── Y ─── Z
             /               \
      A ─── B ─── C ─── D ─── E      main
                        ^
                    origin/main
At this point, you can push your changes to origin:
$ git push
And the origin remote repository will look like:
    Origin:
               X ─── Y ─── Z
             /               \
      A ─── B ─── C ─── D ─── E      main
If you fetch right after, your repository will be updated like this:
               X ─── Y ─── Z
             /               \
      A ─── B ─── C ─── D ─── E      main
                              ^
                          origin/main
Rewriting history
Rebasing
In the example above, we used the merge technique we have already seen when we discussed branches. It makes the history complicated. There is another technique that you can do provided you never shared your changesets X, Y or Z yet: rebasing. Rebasing will re-apply your changes on top of the fetched ones and it will change the base of your trunk. After the rebase, the base of your trunk will no longer be B. This technique re-writes the history in your local repository. This is somewhat dangerous and needs to be done IF AND ONLY IF the history was never shared.
While on branch main, this is done via:
$ git rebase origin/main
And the result will be:
  A ─── B ─── C ─── D ─── X' ─── Y' ─── Z'      main
                    ^
                origin/main
Rebase, like merge, may result in some files conflicting. So exactly like for a merge, you may need to resolve these conflicts. After the rebase, the rebased changesets don’t have the same parent (in the example, B was the parent and now it is D). This is why after the rebase the changesets are no longer X, Y and Z but rather X’, Y’ and Z’. They are no longer the same changesets and Git will assign different commit hashes to each of them.
The rebase operation is usually preceded by a git fetch so you can synchronize your remote tracking branches. However it is possible to fetch from the remote and rebase the current branch in one operation:
$ git pull -r <remote> <remote branch>
Rebase is very interesting because it allows for a cleaner history. Otherwise, every time you fetch and merge the history will reflect what happened and you may get something like:
           X ─── Y ─── T ── U ─── P ──────── Q  < main
         /            /                     /
  A ─── B ─── C ──── G ─────── H ─── I ─── J
                                           ^
                                     origin/main
Whereas if you regularly rebase your work, you get a cleaner:
  A ─── B ─── C ─── G ─── H ─── I ─── J ─── X' ─── Y' ─── U' ─── P'    main
                                      ^
                                origin/main
Squashing
This also allows for something which is called squashing commits. In many cases, people will expect that when you share something with them, what you share contains one single commit - it is not mandatory but it is a good practice. However, while you work it is alway a good idea to commit often, to branch, to try things, etc… To turn several commits into one commit you squash them. When you do so, git will actually reapply all the diff of all the commits you are squashing and then will record one single commit at the end. Reapplying diff is like reapplying changesets on top of others like we have seen with the rebase commands. And in practice to squash, we actually do a rebase but we instruct git that the rebase will be interactive. You need to also tell git from where you want to start the rebase:
$ git rebase -i HEAD~2
In the above example, we tell git to do an interactive rebase starting from the commit identified by HEAD~2. If your history is linear, the standard rebase command will reapply the commits and the result will be exactly similar to what you had before the rebase. Indeed reapplying linearly commits which were already linear won’t change anything. However, because we instruct git to do an interactive rebase, before reapplying everything git will open your text editor and list all the commits starting right after the one you provided on the command line (here: HEAD~2). And in front of each commit, there will be an instruction about what git should do with that commit:
pick b674da4 Commit #1 we want to squash
pick 48b8578 Commit #2 we want to squash

# Rebase 469815b..48b8578 onto 469815b (2 command(s))
#
# Commands:
# p, pick = use commit
# r, reword = use commit, but edit the commit message
# e, edit = use commit, but stop for amending
# s, squash = use commit, but meld into previous commit
# f, fixup = like "squash", but discard this commit's log message
# x, exec = run command (the rest of the line) using shell
#
# These lines can be re-ordered; they are executed from top to bottom.
#
# If you remove a line here THAT COMMIT WILL BE LOST.
#
# However, if you remove everything, the rebase will be aborted.
#
# Note that empty commits are commented out
As you see, before rebasing you can re-order the commits, change the commit log message, remove a commit, squash them, etc… This is extremely powerful. You simply need to change the pick command in front of the commit to whatever command you want to do. This allows, once you are done and if you have regularly rebased from origin to squash all your commits and share one single commit.
From this:
  A ─── B ─── C ─── G ─── H ─── I ─── J ─── X' ─── Y' ─── U' ─── P'    main
                                      ^
                                origin/main
You can rebase all of your commits by doing a git rebase -i HEAD~4 and instruct git to squash everything and then get:
  A ─── B ─── C ─── G ─── H ─── I ─── J ─── K    main, with K = { X' .. P'}
                                      ^
                                  origin/main
Note that in git rebase -i HEAD~N, HEAD~N represents the N+1 latest commit. Indeed, HEAD is the latest one, HEAD~1 is its parent, etc… However git will start the rebase right after the revision identifier you provided. So when you specify HEAD~N you can work on the N latest commits and squash them. It is a good way to remember what revision identifier to provide to git when you want to squash the N latest commits.
IMPORTANT: When you do this, you rewrite the history. You must NEVER do this on something that you have already shared or that is coming from someone’s else. The golden rule to follow is to NEVER EVER rewrite the history after it was shared.
Fixing mistakes
Sometimes right after you commited a change, you realize that you did a mistake and forgot something that should have been part of the commit you just did. Fortunately for this case, git has you covered. You simply need to do the change as if you were going to create a new commit. However, instead of committing as you would normally do, you need to do:
$ git commit --amend
As the command implies, the latest commit will be amended to include the new changes you are about to commit. So in practice, everything will be as if you did just one commit with the changes you intended to do together. There won’t be two separated commits. Of course, this can only be done if the commit you are amending was never shared with anyone. Do note that you can only amend the latest commit.
Additionally, if you want to remove commits as if they never existed, provided you never shared these changes with anyone, git provides you with the means to still do some edits and fix mistakes.
To completely throw away some commits, you can use:
$ git reset <revision specifier>
This will remove from the history all the commits after the one specified by the revision specifier. By default the work tree is left untouched. So after a reset, you work tree will contain all the combined changes from the removed commits unstaged. To reset the history and reset the work tree at the same time, you can do:
$ git reset --hard <revision specifier>
When doing a git reset, the index is also resetted. So if you had some staged changes, they will become unstaged. That’s why the command to unstage changes is simply:
$ git reset
which implies HEAD as the revision specifier. HEAD is the latest commit in the branch, so in practice git reset will not remove any commit since there is none after HEAD and it will simply reset the index. If you do a git reset --hard, not only the changes are unstaged but they are also deleted as the work tree is also resetted to the specified revision which is HEAD.
Of course, this seems obvious, but NEVER DO THIS ON CHANGESETS THAT HAVE BEEN SHARED.
Collaboration Model
Git does not impose any collaboration workflow upon the development team. There is no technical requirement forcing to have a central repository. As stated by Linus Torvalds in an August 2007 email:
I certainly agree that almost any project will want a “central” repository in the sense that you want to have one canonical default source base that people think of as the “primary” source base. But that should not be a technical distinction, it should be a social one, if you see what I mean.
So it is up to the team to come up with a collaboration model that suits itself. That worflow is then usually enforced by the tools around git (Ex: Github, Gitlab, Bitbucket, Gitea, Codeberg, etc… ).
The two most used collaboration models are:
- the shared repository (aka the centralized workflow),
- the fork & pull
Another one exists: patches & emails but I won’t be covering this much.
Centralized Workflow
In this workflow, as the name implies, everything revolves around a central repository. This is going to be familiar to people with SVN or other Centralized VCS because the concepts are the same: there is a canonical repository that every developers pushes to. This implies that every developers participating to the project has write acess to that repository so it is often practical for small/medium size teams.
               (Clone)           (Clone)
                  \              /
                   \            /
 (Clone) ─────  [[ Main Repository ]] ────────── (Clone)
                  /               \
                 /                 \
             (Clone)              (Clone)

(....): denotes a privately owned repository
[[..]]: denotes a repository accessible by all team members
This model enforces a star topology where all collaboration happens through the main repository. As Git makes it easy to manage branches, in this model, a group of developers could decide to work on their own feature in a dedicated branch on the main repository. This is often referred to as the feature branch worflow.
Many companies use this model internally. It is still possible to use Code Reviews with this workflow but it will heavily depends on the tool that is used. For instance, to my knowledge Github in this workflow only supports support creating a diff from a branch that exists within the main repository. (Note for those with already prior knowledge about Github: such a diff is created via a Pull Request in Github.) So it’s possible to open a diff from a branch B so the code can be reviewed before getting merged in the main trunk (or another branch) but it’s not possible to open a diff for code review for that code to get into the branch B in the first place. The Gerrit Code Review tool on the other hand supports this workflow quite well with some nice features on top.
The Fork & Pull Workflow (Github)
This workflow was popularized by Github. It’s quite useful when developers don’t have write access to the canonical repository. That’s why it became so much used for open-source projects allowing anyone to submit code even though they don’t have write access to the main repository. In this model each participant has two repositories: one that is private and where they do their development and another (usually a bare one) that is publicly accessible (or within an organization) in read mode - called a Fork - and that is used to exchange code.
                      [[ Main Repository ]]
    \________________________________________________________/
        |               |             |             |
        |               |             |             |
    [[Fork]]        [[Fork]]      [[Fork]]      [[Fork]]
        |               |             |             |
        |               |             |             |
    (Clone)         (Clone)       (Clone)       (Clone)
      ^                ^              ^            ^
    Alice             Bob           Carol         Dan

(....): denotes a privately owned repository
[[..]]: denotes a repository publicly accessible in read mode

In this example, ALice, Bob, Carol and Dan each have their own fork,
publicly available, and the clone for their fork privately accessible.
In this model, Alice does some work and pushes it to her fork when she is ready to share it. Once the changes she made are in her fork, she will contact one of the owners of the main repository and ask them to pull the code from her fork so it can be merged there. Tools like Github, Gitlab, Bitbucket, etc… makes this workflow easier: they host the main repository and the forks. In that case, asking the main repository owner to pull the code does not require contacting the owner (via chat, email, phone, etc..) but you open what is known as a “Pull Request” (PR) (or “Merge Request”) to the main repository.
A typical flow would be:
                     Open Pull Reqest to               Push Code
              +-----------------------------+  +---------------------+
              |                             |  |                     |
              V                             |  V                     |
 [[ Main Repository]]  ................  [[ Fork ]]  ........... (Clone)
        |                                                           ^
        |                                                           |
        +-----------------------------------------------------------+
                                 Fetch Code
Once the Pull Request is opened, a maintainer of the main repository can comment on the code and requests some changes if necessary. To amend the pull request, Alice would need to send more commits to the branch from which the PR was opened. Once the PR is approved, all the commits are merged into the main repository.
Working with a Fork/Pull Model
It is very possible that your Pull Request becomes stale if some development happened in the main repository in the meantime. Usually the maintainer is going to ask you to handle the conflict so a clean merge can be done. You have two options: merge or rebase.
Let’s look at an example. Suppose you start from this point where origin is your fork and upstream the main repository. The branch in your repo is called feature.
                          feature, origin/feature
                           V
               X ─── Y ─── Z
             /
      A ─── B ─── C ─── D
                        ^
                     upstream/main
If you merge, you are going to have the following:
               X ─── Y ─── Z
             /               \
      A ─── B ─── C ─── D ──── E < feature, origin/feature
                        ^
                     upstream/main
So when doing a pull request after a merge, you send to upstream a somewhat complicated history with branches. However, if you rebase you will obtain the following:
                       origin/feature
                           V
               X ─── Y ─── Z
             /
      A ─── B ─── C ─── D ─── X' ─── Y' ─── Z'
                        ^                   ^
                     upstream/main        feature
In the case of the rebase, you create a linear history. Whether using merge or rebase is mostly a matter of taste. Some projects are strict about maintaining a linear history. Also rebase comes with some risks as you are rewriting the history. Let’s see why.
After you are done with your rebase, you need to push it to origin. A normal push won’t work because you have rewritten the history of your local repository. Pushing would create two heads on the master branch of origin. So you need to force-push to overwrite the history of origin. This is one of the few cases where force push is actually useful. You will get the following:
      A ─── B ─── C ─── D ─── X' ─── Y' ─── Z'
                        ^                   ^
                     upstream/main        feature, origin/feature
There is one golden rule though: as you are re-writting the history of the repository when doing a rebase, do not rebase if your changes have already been shared with another repository than origin. The reason why is well explained on the git website.
Pull Requests and Diff in Github
Github when creating a PR will also generate a diff for that PR so that the code can be reviewed. To do so, Github will use the 3-dots with git diff. In other words, it will generate a diff between the most recent common ancestor of the source branch and the target branch with the source branch.
    git diff target...source
        +--------------+
        |              |
        |              V
        |            source
        |              V
        |  X ─── Y ─── Z
        V /
  A ─── B ── C ── D ── E < target
The command git diff target...source shows the diffs from all the changesets in source and ignoring the changesets added in target after the branch point (i.e the merge base), effectively showing the changes that would be brought into target by merging source. See Github explanation.
Patches & Emails
Interestingly, none of the workflows above is how the Linux development cycle - for what Git was invented for - is done. How Linux developers work is quite fascinating. They do the code in their clone but when they are ready to share it, they use git to create a set of patches that are then shared to the Linux Kernel Mailing list (actually to the maintainers of the sub-system being modified). From that point, the code and design are actively discussed over emails within a thread - like a code review - and this might result in the patches being amended. Eventually, when everyone is happy, the patches are integrated within the maintainer tree and propagated all the way to Linus Torvalds. Example of such threads
This email-based workflow is still used by several major open-source projects including the Linux kernel, Git itself, and many others. While it might seem old-fashioned compared to web-based pull requests, it offers advantages: no dependency on centralized platforms, complete integration with email clients, and reviewers can work offline.
How the Email Workflow Works
The email-based contribution workflow involves three main git commands:
git format-patch- Converts commits into patch filesgit send-email- Sends patches to a mailing listgit am- Applies patches from email (used by maintainers)
Typical workflow:
Contributor                          Mailing List                    Maintainer
    |                                      |                              |
    | 1. Make commits                      |                              |
    | 2. git format-patch                  |                              |
    | 3. git send-email ──────────────────>|                              |
    |                                      |────> Discussion & Review     |
    |                                      |<──── Feedback                |
    | 4. Amend & resend v2 ───────────────>|                              |
    |                                      |────────────────────────────> |
    |                                      |              5. git am       |
    |                                      |              6. git push     |
Submitting Patches: The Contributor Side
Step 1: Create your commits
Make your changes and commit them as you normally would:
$ git add <files>
$ git commit -m "Fix bug in authentication module"
Step 2: Format patches
Create patch files from your commits:
# Create patch for the last commit
$ git format-patch HEAD^

# Create patches for the last 3 commits
$ git format-patch HEAD~3

# This creates numbered files:
# 0001-Fix-bug-in-authentication-module.patch
# 0002-Add-test-for-auth-fix.patch
# 0003-Update-documentation.patch
Step 3: Send patches via email
You can send patches directly without creating files first:
# Send the most recent commit
$ git send-email HEAD^

# Send the last 3 commits
$ git send-email HEAD~3
Or send the patch files you created:
$ git send-email *.patch
The email subject will be: [PATCH] Fix bug in authentication module
For multi-patch series, use a cover letter:
$ git format-patch --cover-letter HEAD~3
# Edit 0000-cover-letter.patch to explain the series
$ git send-email *.patch
The cover letter should explain:
- What the patch series does
- Why the changes are needed
- How you tested the changes
- Any design decisions
Step 4: Iterate based on feedback
When reviewers request changes:
- Make the requested changes
-
Amend your commit (don’t create new “fix” commits):
$ git add <files> $ git commit --amend -
Resend with a version number:
$ git send-email -v2 HEAD^The email subject becomes:
[PATCH v2] Fix bug in authentication moduleNote: The commit message stays the same; only the email subject prefix changes to indicate this is version 2.
-
In the email body or as a reply, include a changelog explaining what changed:
Changes in v2:
- Added error handling as suggested by reviewer
- Fixed memory leak
- Added test case
Complete revision example:
Email subject: [PATCH v3] Fix bug in authentication module

[Your original commit message here]

---
Changes in v3:
- Improved error messages per review feedback
- Added bounds checking

Changes in v2:
- Added error handling as suggested by reviewer
- Fixed memory leak
- Added test case
Applying Patches: The Maintainer Side
Step 1: Receive patches
Patches arrive via email to the project mailing list. Save the email or access it from the mailing list archive.
Step 2: Apply with git am
# Apply from a saved email file
$ git am < patch-email.txt

# Apply multiple patches from a mailbox
$ git am /path/to/mailbox

# Apply from a URL (many archives provide raw patch URLs)
$ curl https://lore.kernel.org/.../ | git am
Step 3: Handle conflicts
If conflicts occur:
$ git am --show-current-patch    # See the patch being applied
# Resolve conflicts in files
$ git add <resolved-files>
$ git am --continue

# Or abort if needed
$ git am --abort
Step 4: Test and push
After applying patches, test them and push to the repository:
$ # Run tests
$ git push
Important Concepts
Sign-off (DCO - Developer Certificate of Origin):
Many projects require a “Signed-off-by” line certifying you have the right to contribute the code:
$ git commit --signoff
# or
$ git commit -s
This adds to your commit message:
Signed-off-by: Your Name <you@example.com>
Patch series:
A patch series is a collection of related commits sent together to accomplish a larger goal. Instead of sending one large patch with all changes, you break it into logical, reviewable steps.
Why use patch series:
- Makes review easier by breaking large changes into digestible pieces
- Each patch can be reviewed, tested, and understood independently
- Shows the logical progression of your work
- Easier to identify which specific change caused an issue
- Maintainers can cherry-pick individual patches if needed
Example scenario:
Suppose you’re adding a new authentication feature. Instead of one big patch, you create a series:
0000-cover-letter.patch
0001-Add-password-hashing-utility-functions.patch
0002-Create-user-authentication-database-schema.patch
0003-Implement-login-endpoint.patch
0004-Add-session-management.patch
0005-Add-authentication-tests.patch
0006-Update-documentation-for-auth.patch
Creating a patch series:
# You have 6 commits for the feature
$ git log --oneline HEAD~6..HEAD
abc123f Update documentation for auth
def456a Add authentication tests
789bcd0 Add session management
012efg3 Implement login endpoint
345hij6 Create user authentication database schema
678klm9 Add password hashing utility functions

# Create patches with a cover letter
$ git format-patch --cover-letter HEAD~6

# This creates:
# 0000-cover-letter.patch
# 0001-Add-password-hashing-utility-functions.patch
# 0002-Create-user-authentication-database-schema.patch
# 0003-Implement-login-endpoint.patch
# 0004-Add-session-management.patch
# 0005-Add-authentication-tests.patch
# 0006-Update-documentation-for-auth.patch
Writing the cover letter:
Edit 0000-cover-letter.patch to explain the series:
Subject: [PATCH 0/6] Add user authentication system

This series implements a complete user authentication system including
password hashing, login endpoints, and session management.

The patches are organized as follows:
1. Utility functions for password hashing (foundation)
2. Database schema for users and sessions
3. Login endpoint implementation
4. Session management for authenticated users
5. Comprehensive test suite
6. Documentation updates

Each patch builds on the previous ones and can be applied independently.
All patches pass the test suite.

Testing:
- Tested manually with various user scenarios
- All existing tests still pass
- New tests achieve 95% code coverage of new code

[Your Name] (6):
  Add password hashing utility functions
  Create user authentication database schema
  Implement login endpoint
  Add session management
  Add authentication tests
  Update documentation for auth

 auth.c          | 150 +++++++++++++++++++++++++++++++++++++++
 auth.h          |  30 ++++++++
 schema.sql      |  25 +++++++
 tests/test.c    | 200 ++++++++++++++++++++++++++++++++++++++++++++++++
 docs/auth.md    |  80 ++++++++++++++++++++
 5 files changed, 485 insertions(+)
Patch series best practices:
- Logical ordering: Each patch should build on previous ones
- Start with foundational changes (data structures, utilities)
- Then core functionality
- Finally tests, documentation, and polish
- Self-contained patches: Each patch should:
- Compile without errors
- Not break existing functionality
- Have a clear, single purpose
- Include its own commit message explaining the “why”
- Size matters:
- Too small: Creates noise, makes it hard to see the big picture
- Too large: Difficult to review, hard to identify issues
- Sweet spot: 50-300 lines per patch (guideline, not rule)
- Cover letter content:
- High-level overview of what the series accomplishes
- Why the changes are needed
- How you structured the series
- Testing methodology
- Known limitations or future work
- Dependencies (if any)
Sending a patch series:
# Send all patches including cover letter
$ git send-email --to=list@example.org 0*.patch

# Or directly from commits
$ git send-email --cover-letter --to=list@example.org HEAD~6
Receiving feedback on a series:
When reviewers request changes to specific patches in the series:
- Check out the commit you need to modify:
$ git rebase -i HEAD~6 # Mark the commit to edit - Make the changes:
$ # Edit files $ git add <files> $ git commit --amend $ git rebase --continue - Regenerate and resend the entire series with version bump:
$ git format-patch --cover-letter -v2 HEAD~6
# Update the cover letter with changelog
$ git send-email --to=list@example.org 0*.patch
Version tracking in series:
When resending, update the cover letter with changes:
Subject: [PATCH v2 0/6] Add user authentication system

Changes in v2:
- Patch 3: Fixed SQL injection vulnerability (thanks Reviewer)
- Patch 4: Improved session timeout handling
- Patch 5: Added test for edge case in login

[Original cover letter content...]
Bad example (don’t do this):
# One giant patch doing everything
0001-Add-complete-authentication-system.patch  (2000 lines)
This is hard to review, hard to test, and if there’s one issue, the entire patch gets rejected.
Good example:
# Logical, reviewable steps
0001-Add-hash-utils.patch        (80 lines)
0002-Add-db-schema.patch         (40 lines)
0003-Add-login-endpoint.patch    (120 lines)
0004-Add-sessions.patch          (150 lines)
0005-Add-tests.patch             (200 lines)
0006-Add-docs.patch              (90 lines)
Each patch can be reviewed quickly, understood easily, and if one has issues, the others can still be accepted.
Email etiquette:
- Use plain text email (no HTML)
- Reply inline, below quoted text (no top-posting)
- Keep line width under 72-80 characters
- One logical change per commit
Common git send-email options:
--to=list@example.org           # Specify recipient
--cc=reviewer@example.org       # CC reviewers
-v2                             # Mark as version 2
--annotate                      # Edit before sending
--in-reply-to=<message-id>      # Reply to existing thread
Tools and Resources
Patchwork - Web interface for managing email patches:
- Organizes patches from mailing lists
- Tracks state (new, under review, accepted, rejected)
- Example: Linux Kernel Patchwork
Public-Inbox archives:
- Many projects archive patches publicly
- Example: Git project archive
- Provides web access to email threads and raw patches
Learning resources:
- git-send-email.io - Interactive workflow guide
- Project contribution guides (e.g., Linux kernel)
When to Use Email Workflow
This workflow is required for:
- Linux kernel development
- Git itself
- Many established open-source projects
Advantages:
- No dependency on centralized platforms (GitHub, GitLab)
- Works completely offline
- Built into git from the beginning
- Full control over the collaboration process
- Complete email integration
Most modern projects use pull requests for convenience, but the email workflow remains important for major projects and demonstrates git’s truly distributed nature.